Friday, July 29, 2016
Now you can find us on facebook!
And if you do please like us up and share:) I'll continue to post upcoming events here as well.
Tuesday, July 19, 2016
More Vintage Pretties
I couldn't help myself when I saw these glass trays. The concentric circle design was different then anything I normally see on these trays ... I knew they were just begging for new lives on desks, bedside tables, entryways, maybe in the bathroom. They'd be so handy holding all kinds of stuff ...keys,jewelry,all that random lotion and hair stuff.
A little paint job later with some alcohol inks and what once was old and outdated is new,pretty and ready for a new forever home.
All vintage glass trays are decorative only (non-food) your choice of color :) AND one of a kind, so if there's one you love let me know!(colors may appear different due to monitors and I know they aren't nearly as pretty as in real life:))
Sunday, July 17, 2016
Thanks for coming out to see me!
It was so much fun to see some familiar faces and make some new friends :) I'll be posting any other events I'll be at asap so please check back but as always dont hesitate to contact me.
Wednesday, July 6, 2016
Solar Powered Sign
So maybe not what you're thinking.... I realized a banner for our booth was probably a good idea so people knew who we were. Then I thought why not take this opportunity to do a quick tutorial on sun prints with craft acrylics.I'll add lettering on top of mine to complete my sign but let me know what you do with yours!
So first things you need-
Okay I'm visual so that's the sort of tutorial I do....
So first things you need-
- a sunny summer day (spring and fall are fine too, you just need enough heat and light)
- some fabric -I've only used cotton but linen maybe silk might work as well. It needs to be a natural fiber NO SYNTHETICS OR BLENDS. This is a perfect chance to upcycle a thrifted find or stained item.
- A water source
- A flat surface in sunny spot for your work to remain undisturbed until dry (this is super important)
- acrylic paint (craft acrylics is fine)
- containers for watered down paint
- paint brushes
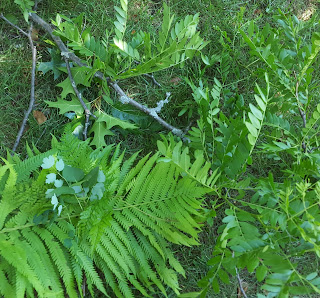
- items for printing- leaves, foliage, letter magnets....whatever . Flatter is better, you want your items to have contact with the fabric.
Okay I'm visual so that's the sort of tutorial I do....
 |
| Start with your sunny day..... |
 |
| Add fabric and flat sunny spot(and water source,not pictured) |
 |
| Find printing objects for negative images |
 |
| Thin out paint to about a cream thickness. Your doing a watercolor wet on wet so just don't lose your contrast with fabric color. |
 |
Wet your fabric really well and have your paint ready this part goes fast if it's hot.
|
 |
| Get as much color on your fabric as you can...this is not my best example. : / |
 |
| Lay your leaves or other printing objects as flat as possible on fabric |
 |
| When its all dry pull off the objects and VOILA ! |
Heat set to help paint stay first and wash separately if needed for the first few times:) HAVE FUN!
Tuesday, July 5, 2016
Monday, July 4, 2016
HOPKINS RASPBERRY FESTIVAL!!!!
I'm so excited to be joining the fun on mainstreet for Hopkins Raspberry Days. It's coming up this month July 16th so put it on your calendar now:)
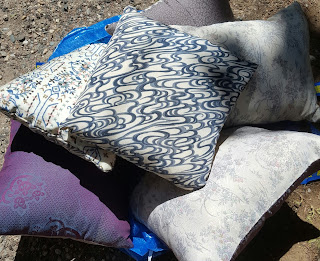
I'll have lots of new upcycled goodies thanks to some lovely kimonos given to me by the FaBuloUs Cynthia Hecter a/k/a Awesome Theater Teacher! They've transformed into handbags and pillows...and maybe something else by then lol.
I'll of course have dozens of pincushions lots of birdbaths and all sorts of other assorted goodies priced to go ....home with you;)
Come on Down and Check us OUT! More info on the festival here. ,
Subscribe to:
Comments (Atom)


