So maybe not what you're thinking.... I realized a banner for our booth was probably a good idea so people knew who we were. Then I thought why not take this opportunity to do a quick tutorial on sun prints with craft acrylics.I'll add lettering on top of mine to complete my sign but let me know what you do with yours!
So first things you need-
- a sunny summer day (spring and fall are fine too, you just need enough heat and light)
- some fabric -I've only used cotton but linen maybe silk might work as well. It needs to be a natural fiber NO SYNTHETICS OR BLENDS. This is a perfect chance to upcycle a thrifted find or stained item.
- A water source
- A flat surface in sunny spot for your work to remain undisturbed until dry (this is super important)
- acrylic paint (craft acrylics is fine)
- containers for watered down paint
- paint brushes
- items for printing- leaves, foliage, letter magnets....whatever . Flatter is better, you want your items to have contact with the fabric.
Okay I'm visual so that's the sort of tutorial I do....
 |
| Start with your sunny day..... |
 |
| Add fabric and flat sunny spot(and water source,not pictured) |
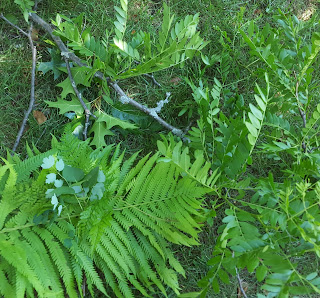 |
| Find printing objects for negative images |
 |
| Thin out paint to about a cream thickness. Your doing a watercolor wet on wet so just don't lose your contrast with fabric color. |
 |
Wet your fabric really well and have your paint ready this part goes fast if it's hot.
|
 |
| Get as much color on your fabric as you can...this is not my best example. : / |
 |
| Lay your leaves or other printing objects as flat as possible on fabric |
 |
| When its all dry pull off the objects and VOILA ! |
Heat set to help paint stay first and wash separately if needed for the first few times:) HAVE FUN!


No comments:
Post a Comment